Show Me
Create Routes and Router
First, let's create two top level routes home and settings. Then we're going to add two additional routes under settings. Finally, we will create and export our router.

Installing the Router
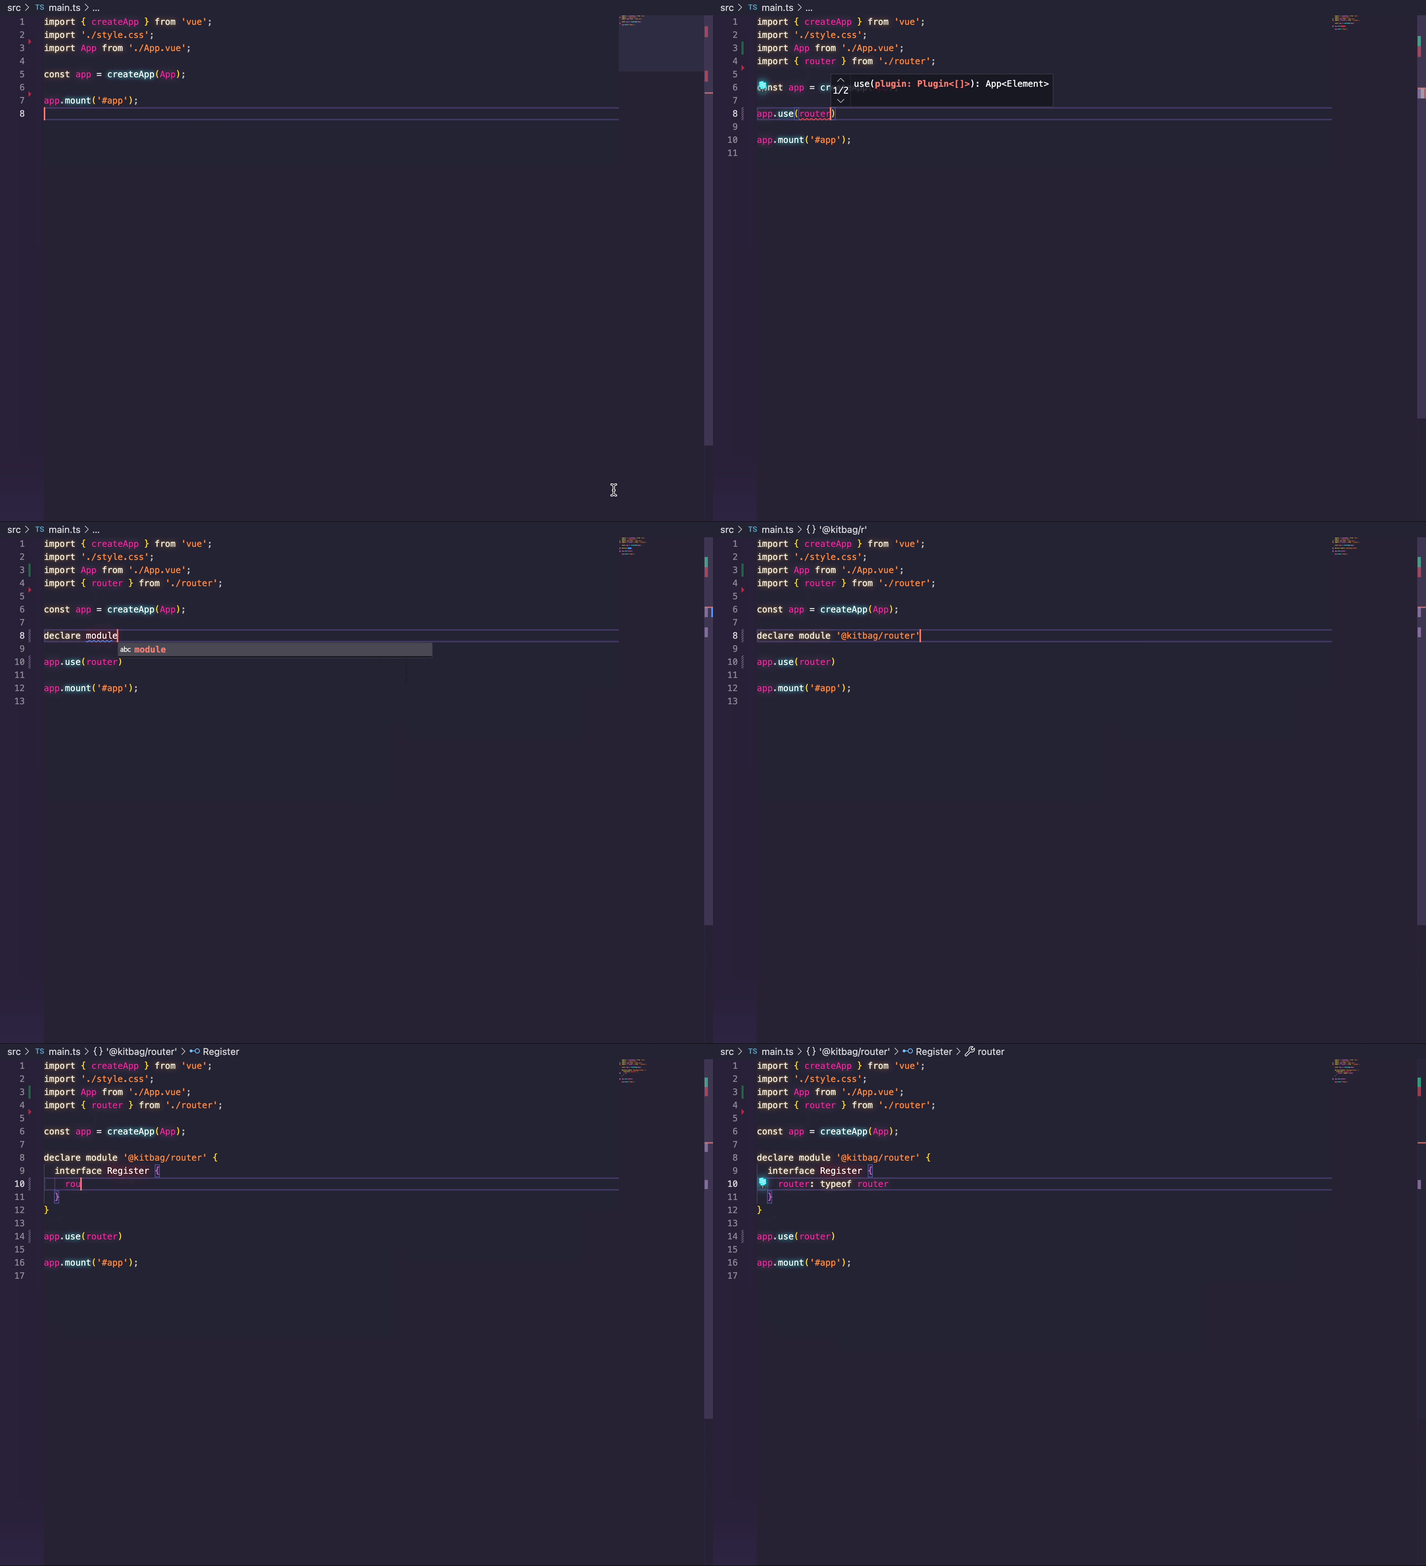
Next, we install the router and register the router type using the Register interface. Read more about updating the registered router.

Navigating with Router Push
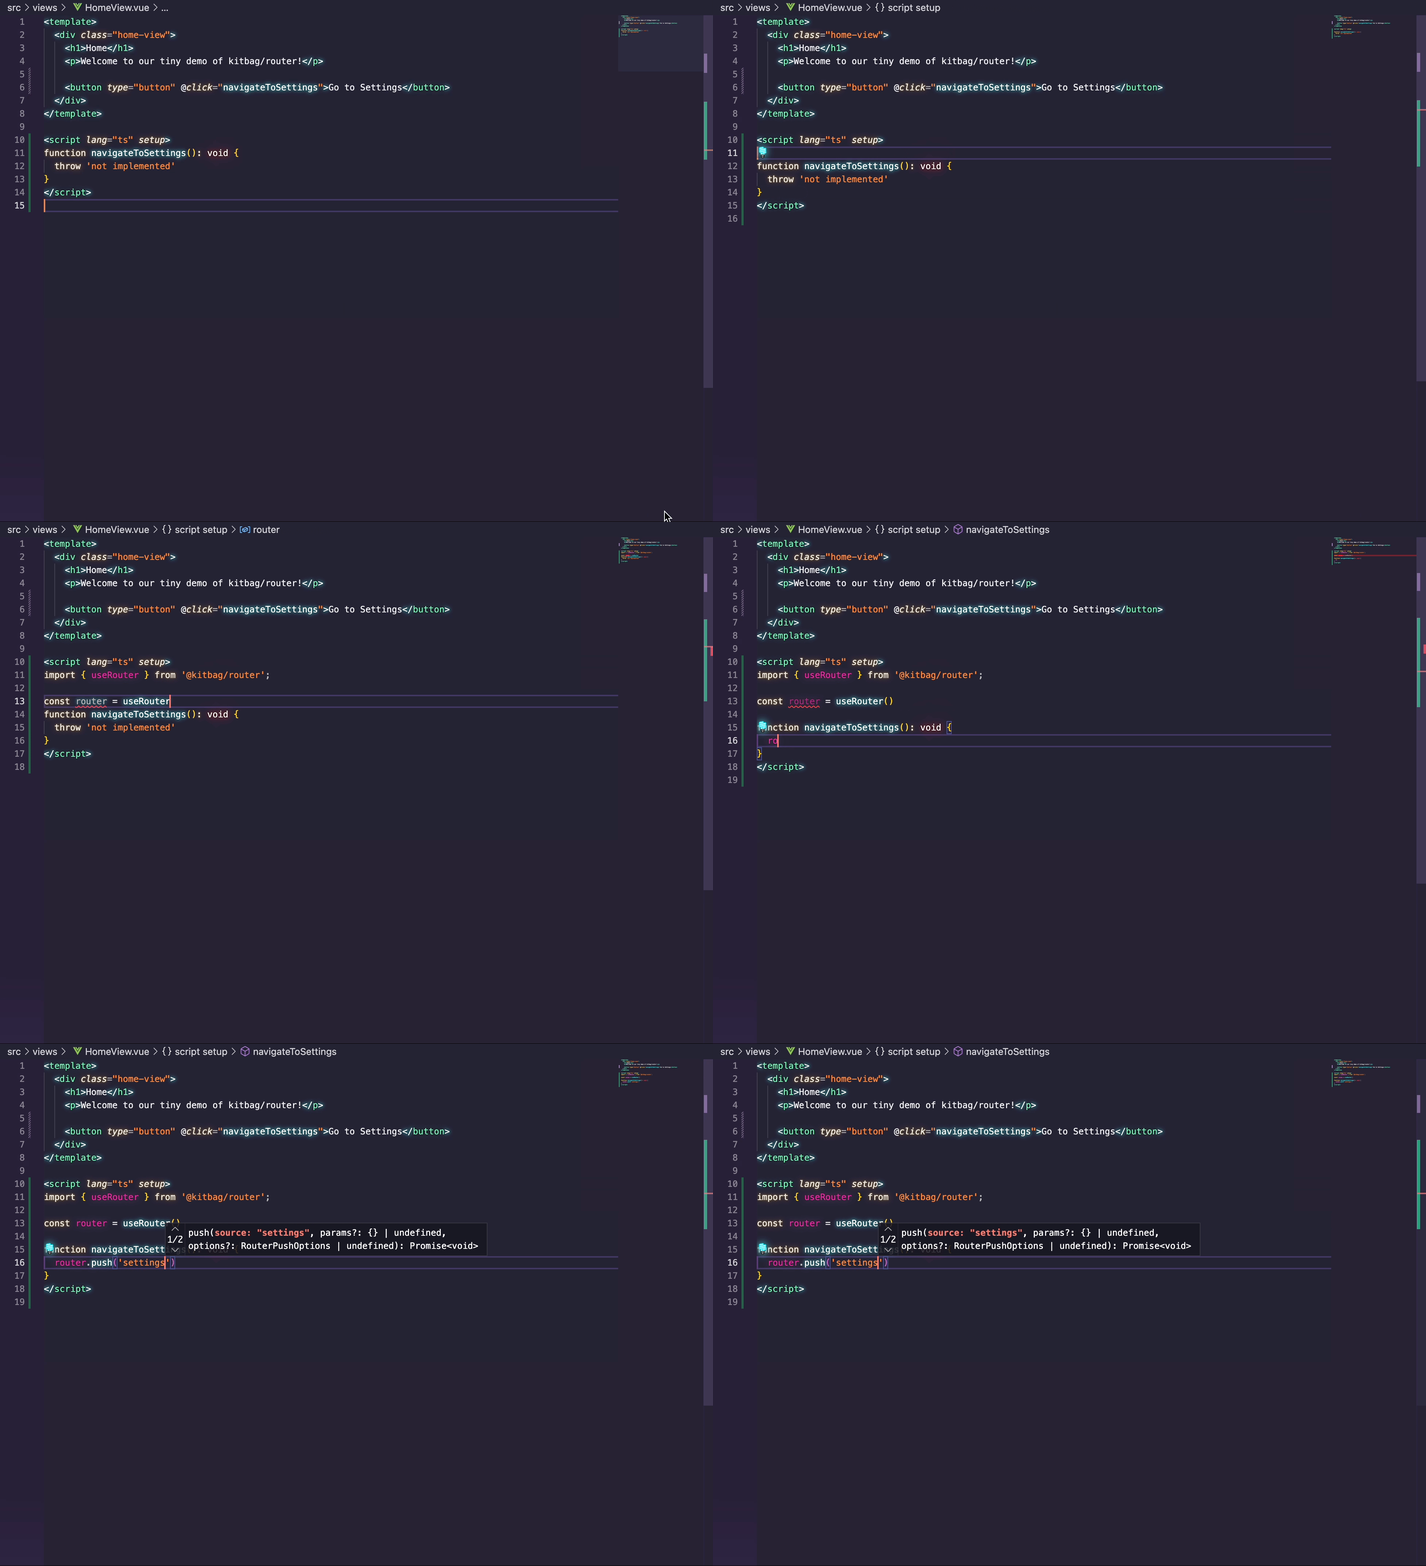
Now we can use the useRouter composable in the setup of the HomeView component. We can then call router.push when the button is clicked. Notice how all four of our routes show up in autocomplete. Typescript will throw an error if a value other than a valid route key or a fully formed external URL. Read more about router push.

RouterView and RouterLink
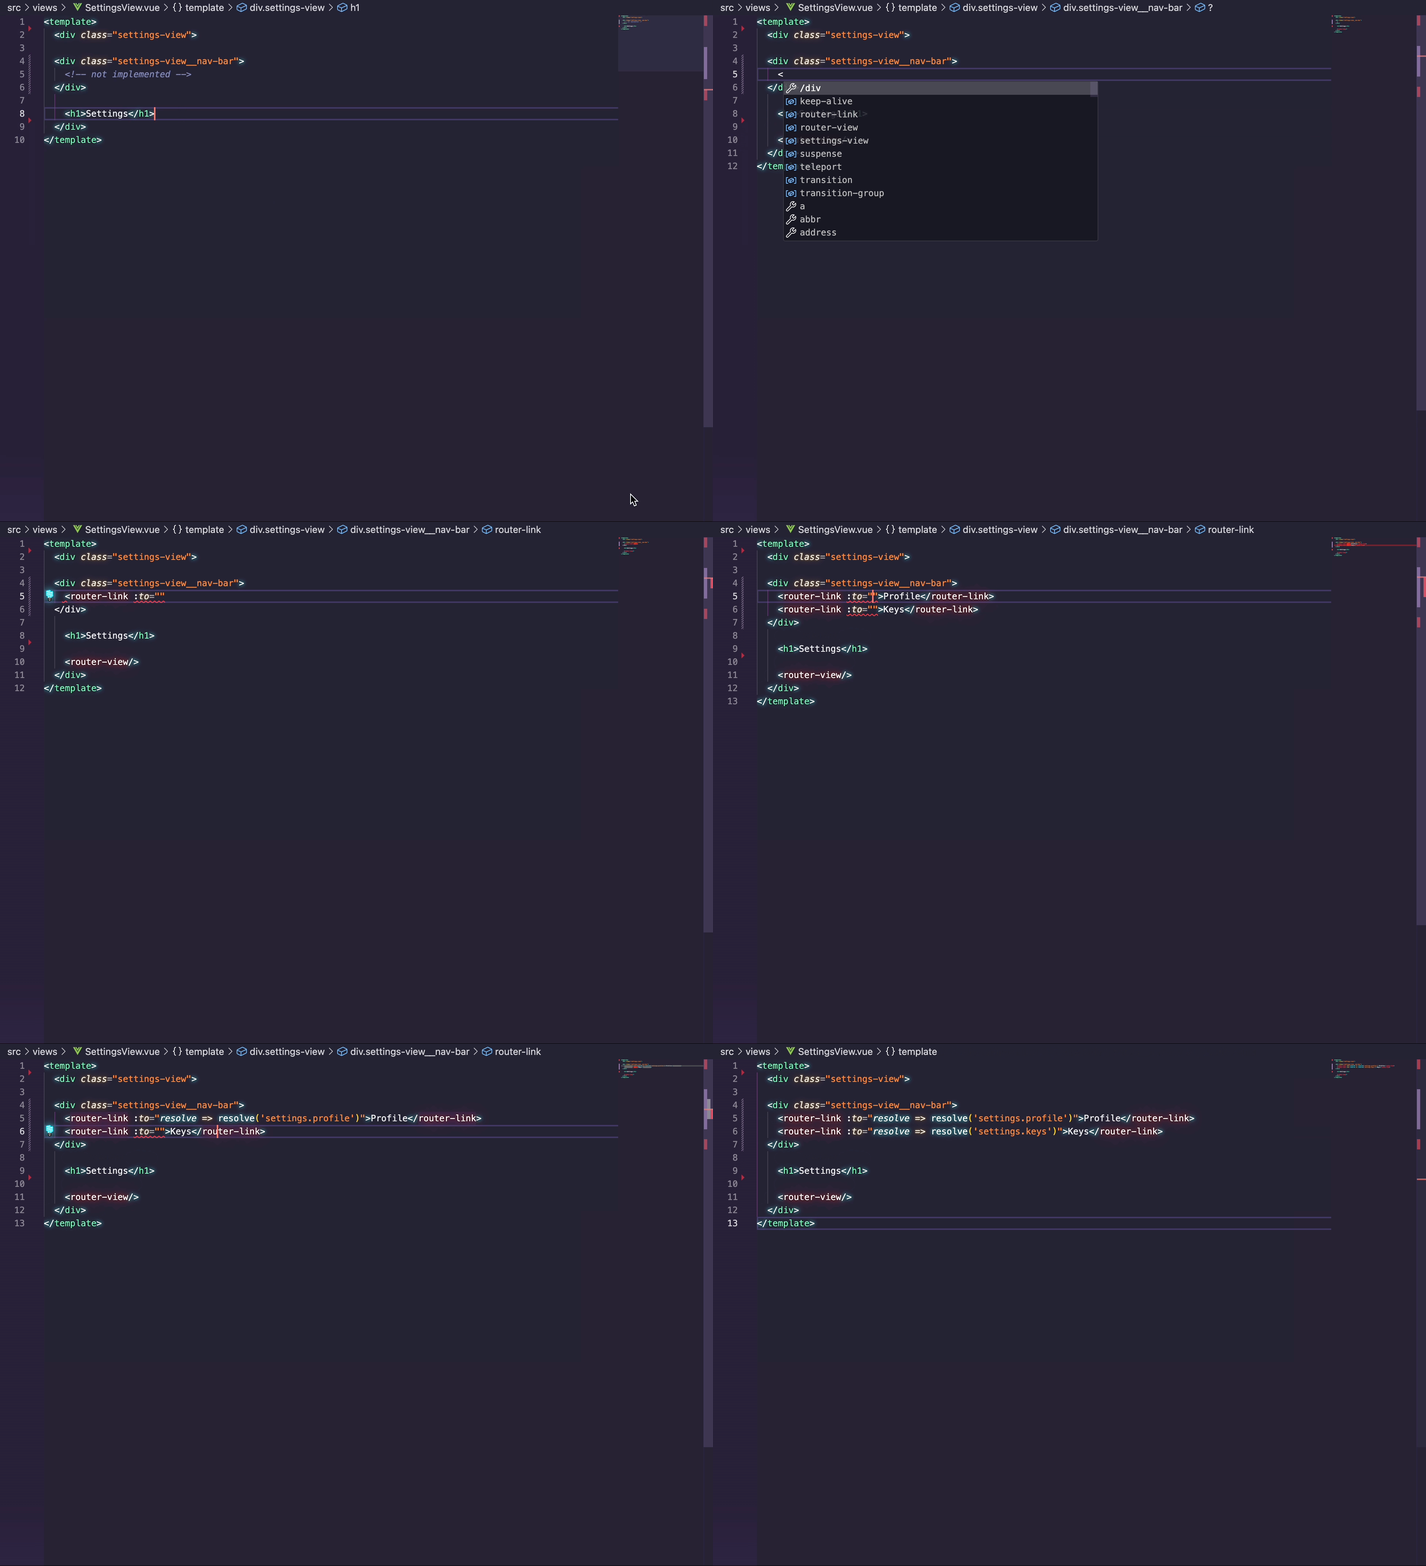
We need to add RouterView component to SettingsView, since it has children. We'll also add a couple RouterLink components to the navbar to give the user links to those child pages. Notice how the to callback syntax is also type safe and autocompletes all possible routes for us.

Adding Params
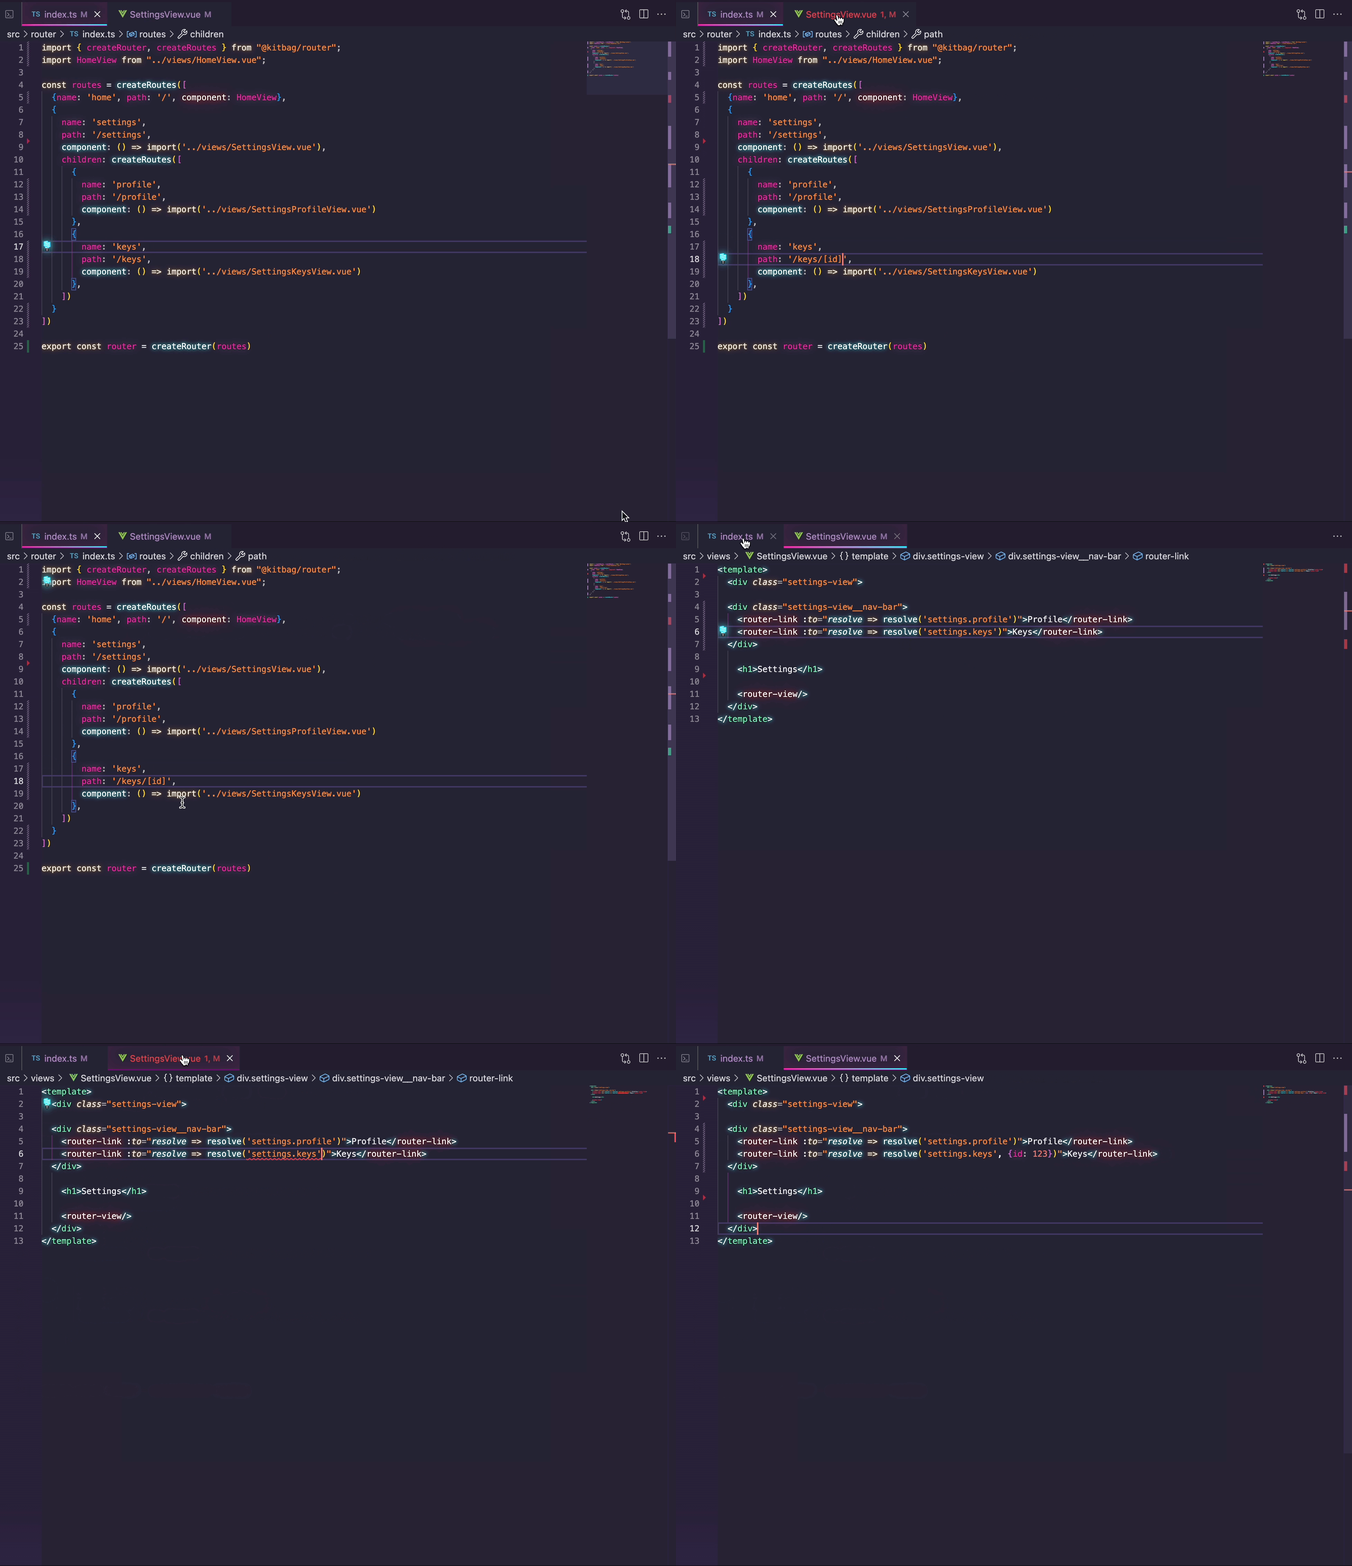
Let's add a param to our settings.keys route. Notice how as soon as I save the route with [id] in the path, I get a Typescript error where I have a router-link in the SettingsView tab. Which I can satisfy by providing a value for that required param. Alternatively I can add (?) to the param, making it optional [?id]. Finally, I'll pull in the path utility to change the expected type for id from string to number. Notice how this too creates Typescript errors until I provide a valid value of the correct type. Read more about route params.
